Use compressed air to blow the pistons out of the cylinders. In order to get compressed air into the brake line, I cut a piece of brake hose and then scrounged some kid toy plastic blow up adapter, and connected it to an air hose. Then I jammed the plastic adaper into the cut end of the brake line and the air compressor blew out the piston. Have a pile of rags positioned to catch the flying cylinder. Then you can use the rags to clean up the mess.
Pelican “101 3-Series Projects” says to roll the boot inside out and then to put it on the piston. Then insert the piston into the caliper and roll the boot over the caliper. That must be for a different brake, because it doesn’t work for the E30 & E36, at least not the brakes I did for those models. In contrast to what the Pelican book said, the boot goes “inside” not “over” the caliper, and the boot has to be fastened to the caliper before you insert the piston, not after.
The Service Manual and Haynes don’t cover this procedure.
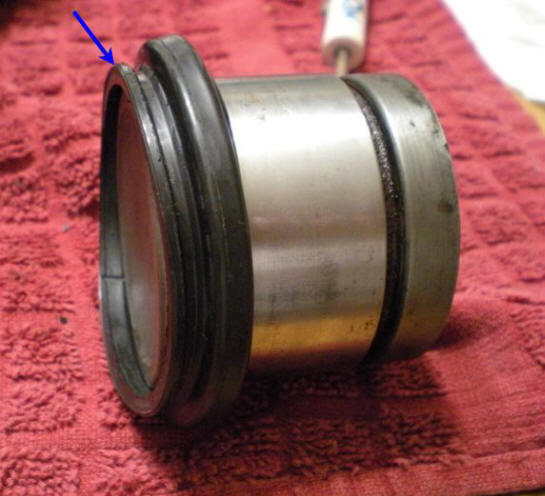
Picture 1, Cylinder and boot.
Don’t turn the boot inside out or do anything else unusual. Just put the boot on the right side of the piston. But then rather then seating the boot into piston groove, pull it beyond the piston groove, all the way to the left side of the piston.
The arrow on the previous picture points to the “cylinder lip” that we will be putting into the cylinder and shoving into a mating “cylinder groove”. Note how the cylinder lip extends beyond the piston by a couple mm. That’s important so you need to keep checking that thru the next step.
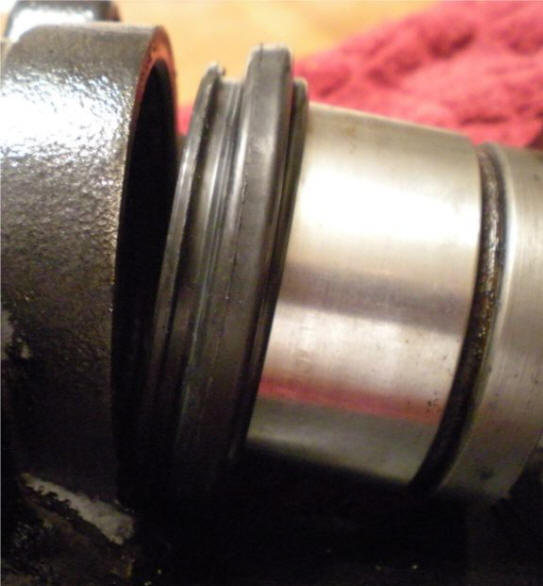
Picture 2, putting the cylinder and boot in place.
What you can’t see here is that the boot’s cylinder lip still extends a couple mm beyond the left side of the piston. Put the bottom of the cylinder lip into the cylinder groove. As long as you keep a couple mm of boot sticking out from the edge of the piston, you can work the lip into the groove all around. It’s that couple mm that give you the room to get this done. If the piston is flush with the edge of the boot, you'll have a helova time getting the lip of the boot into the groove of the cylinder.
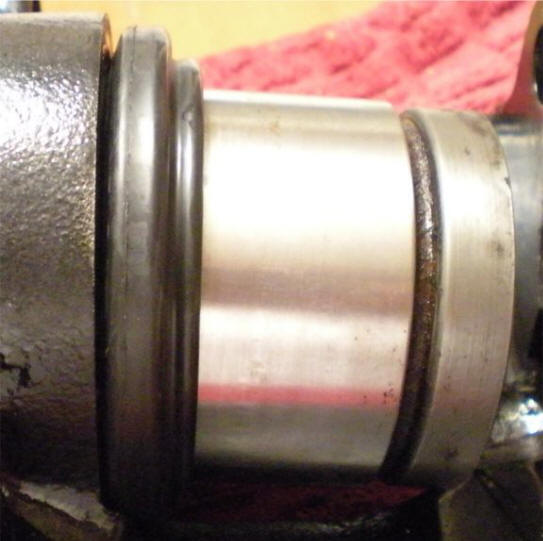
Pic 3, caliper boot is in.
This picture shows the caliper boot correctly seated in the cylinder. The boot’s bulge is flush against the caliper all the way around. In this picture, the piston's leading edge (at left) is still a couple mm outside of the cylinder. You’ve done the hard part, now you just need to push the piston into the cylinder. Which can also be a little tricky, because it can be hard to get the piston going in exactly square. Be patient and get the piston square. Don't substitute force for patience.